
It was developed by the largest cryptocurrency exchange Binance and is integrated into its official app for the most convenient and quick access to decentralized finance. Since the BNB coin is essentially the native token of the Binance ecosystem, this wallet is recommended for its holders.
Web3 Wallet allows you to securely exchange digital assets across different blockchain networks, earn additional income, and interact with a variety of third-party dApps.
The wallet from the Binance exchange operates on distributed computing technology (MPC). Traditional seed phrases are not used in its creation. Instead, three separate fragments that make up the access key are created:
- The cryptocurrency exchange itself is responsible for storing the first fragment;
- The second fragment is stored directly on the user's mobile device;
- The third fragment is encrypted with a password created by the user and is stored in cloud storage or in the form of a QR code.
Binance Web3 Wallet was launched only in 2023 and is currently being actively improved and updated. In the future, the developers plan to integrate more blockchains to expand the wallet's capabilities.
Pros and Cons of Binance Web3 Wallet
The main advantages of the Web3 Wallet from Binance exchange include:
- Security. The wallet integrates advanced protection tools, including the recognition of incorrect addresses and the identification of potentially dangerous smart contracts. When making a transaction, the system will alert the user that a particular token or blockchain network poses a security threat;
- Simplicity. To create a wallet in the Binance app, it takes just a couple of clicks. The user does not need to worry about saving the seed phrase or private keys — everything is automated;
- Staking. Users can freeze their BNB or other crypto assets to earn passive income as a reward for supporting the operation of the blockchain.
Despite the fact that the wallet is developed by a leader in the cryptocurrency industry, it still has some drawbacks. One of them is the lack of anonymity, as the Web3 Wallet is linked to a Binance app account. Unregistered users, as well as those who have not completed identity verification (KYC), will not be able to use it. Furthermore, all transactions undergo AML checks, so the exchange may freeze assets if a connection to 'dirty' addresses is detected.
How to create a Binance Web3 Wallet
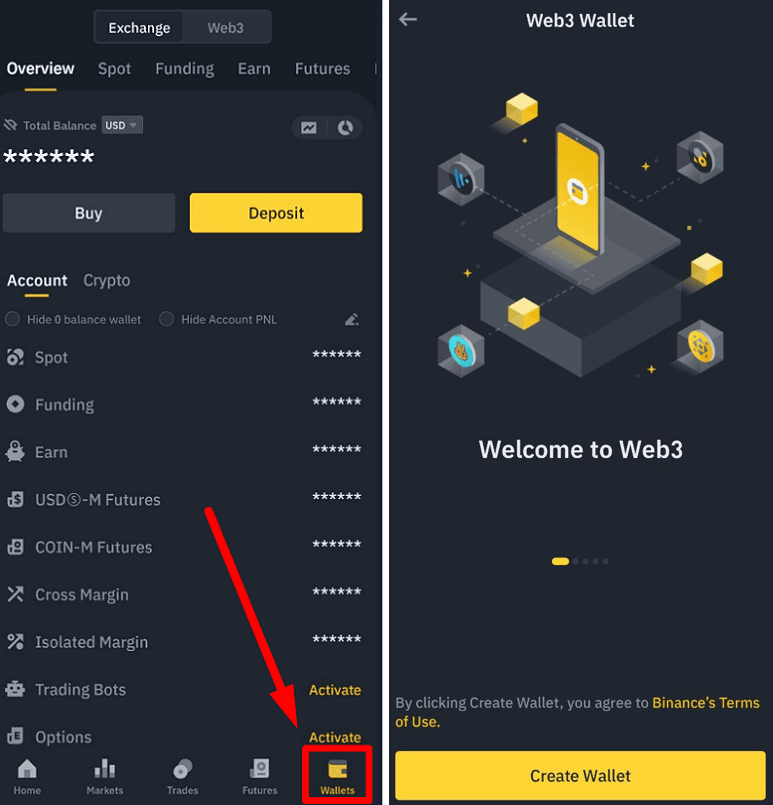
Since the wallet is already integrated into the Binance app, there is no need to download additional third-party clients. To get started, go to the «Wallet» section, then to the Web3 tab, and click the «Create Wallet» button. After that, it will be ready for use, but you need to create a backup to avoid losing your assets.
How to create a backup in Binance Web3 Wallet
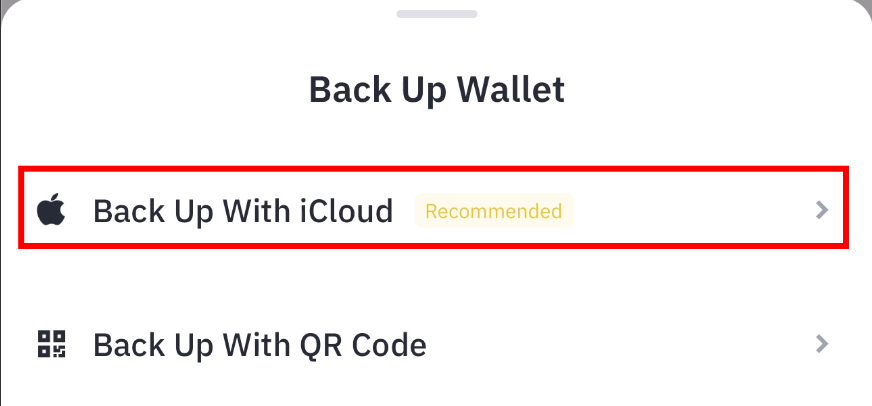
Backups can be created in two ways: using cloud storage or with a QR code.
Backup via cloud storage
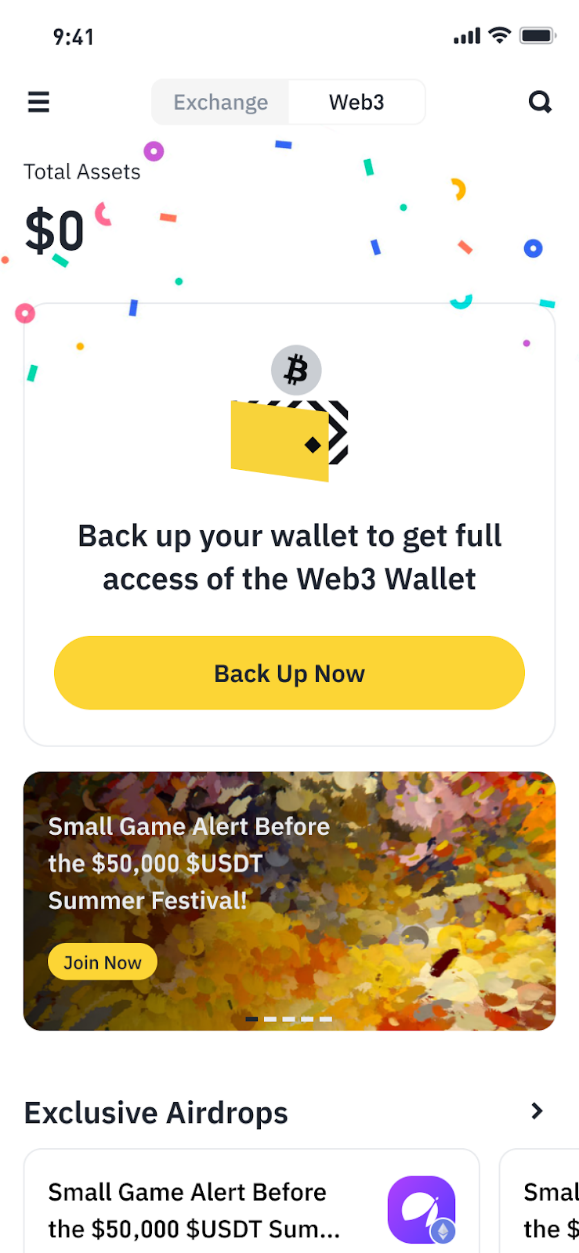
1. In the main menu of the Web3 wallet, select the option "Backup Now".
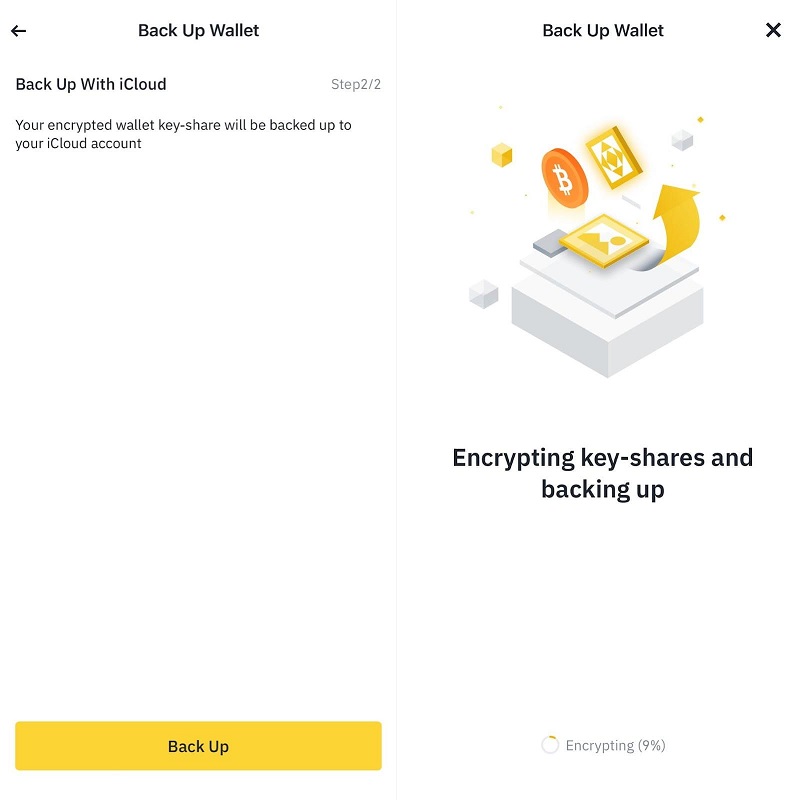
2. In the opened window, select the path "Backup from iCloud". If you are using an Apple device, you need to access cloud storage first and grant the Binance app permission to store data in iCloud. If you are using an Android device, you need to go to your Google account and provide the Binance app with access to Google Drive.
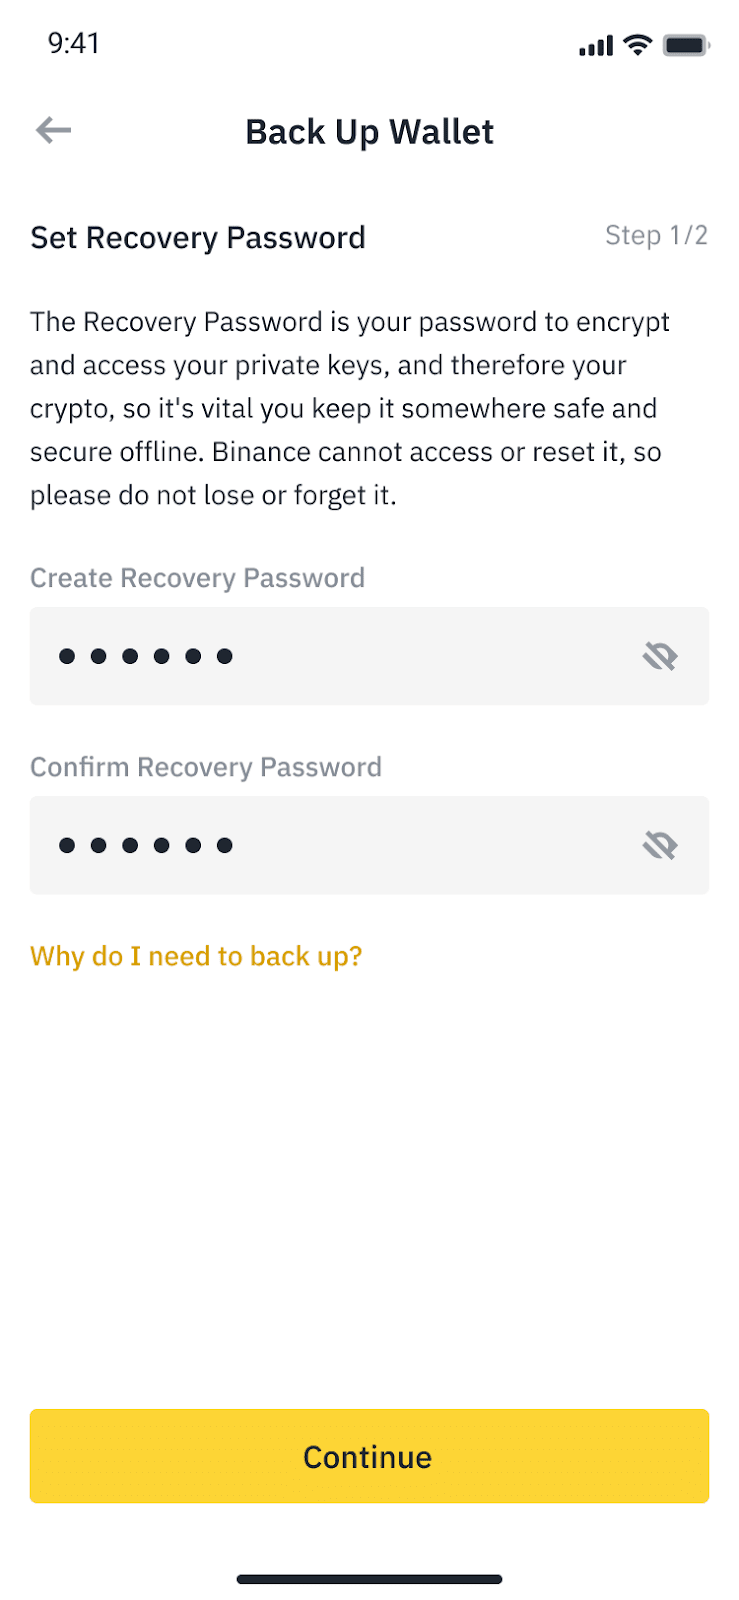
3. Set a password that you will use in case you need to restore access to the wallet, and click the "Continue" button. Do not share this password with anyone and store it in a safe place, otherwise it will be impossible to restore access to the backup for logging in and to the wallet itself.
4. In the next window, check the boxes next to the security tips to confirm your acknowledgment of them, then click the "Continue" button.

5. Click the "Backup" button again. After this action, an encrypted fragment of the access key for the backup will be added to iCloud. Done.
Backup via QR code
1. Repeat all the actions as in the previous instructions until the window with backup methods appears and select the option "Backup with QR code."

2. Set a password to restore access to your wallet. Make sure to store it securely. Then click the "Continue" button.
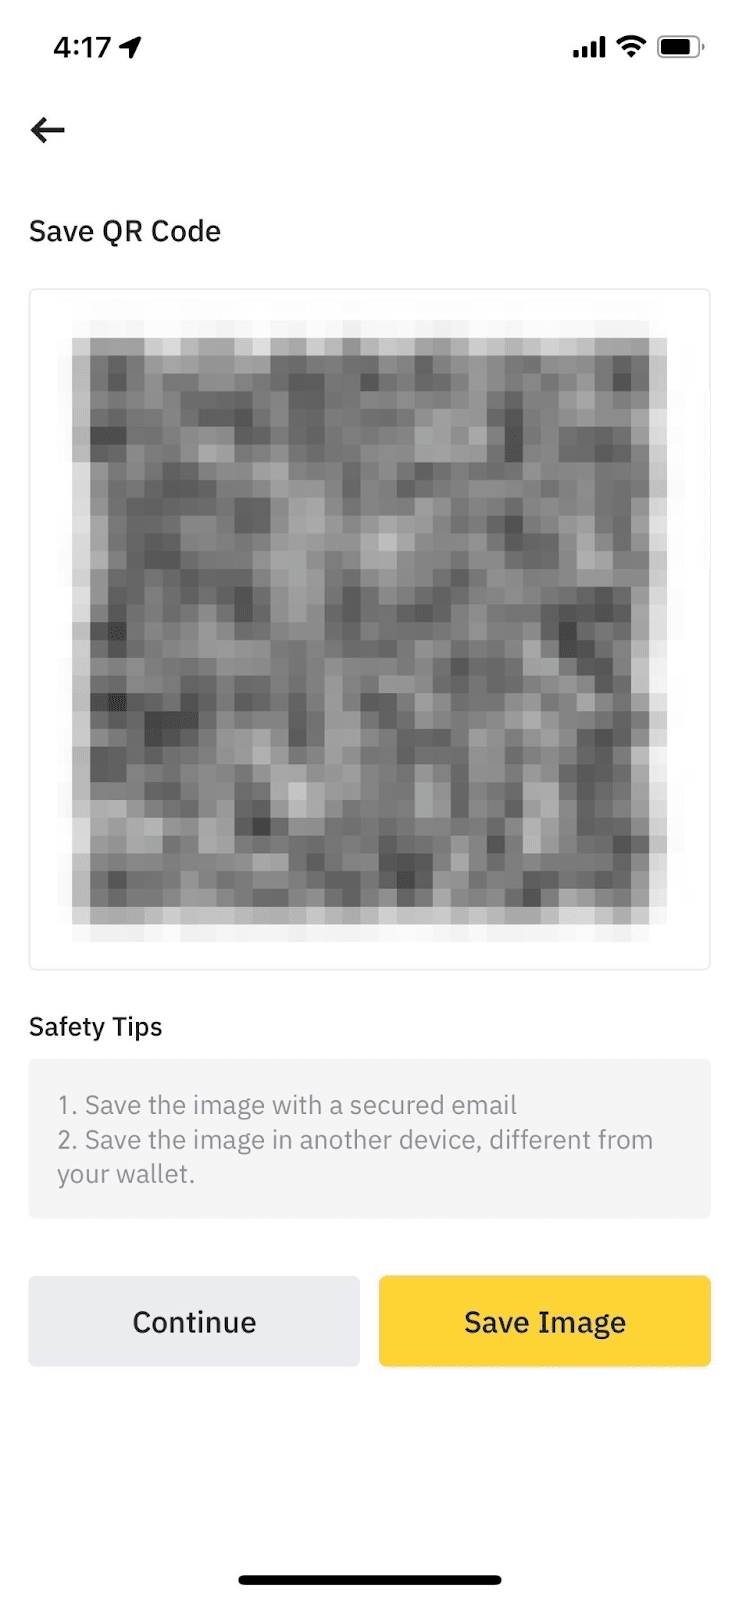
3. Follow the system prompts (similar to the previous instructions) and wait for the backup to complete. After a successful completion, a QR code will appear on the screen. Click the "Save Image" button, and then click "Continue."
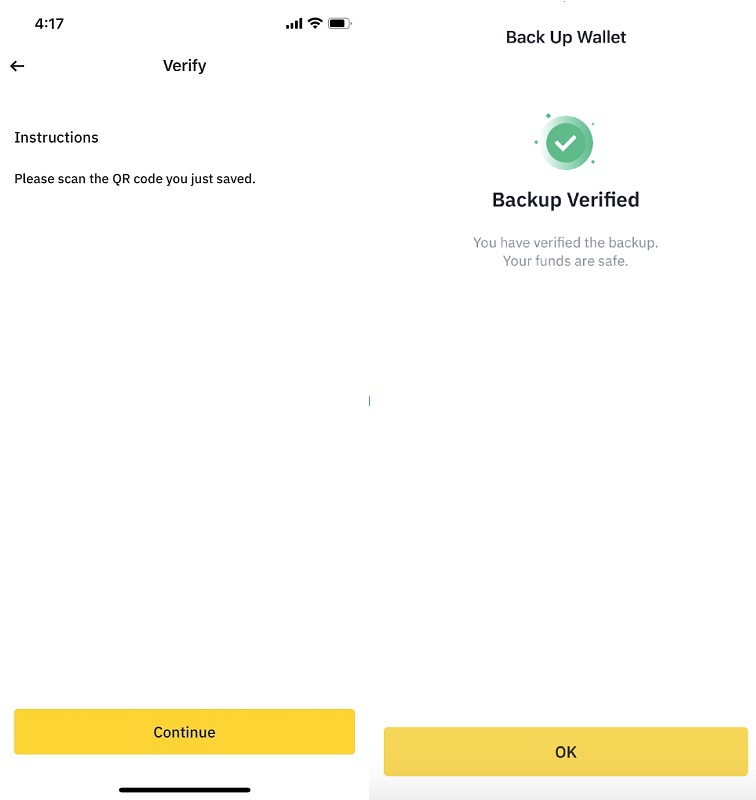
4. The application will prompt you to confirm the created backup. For this, you need to click "Continue" in the pop-up window, scan the image with the QR code, and enter the previously chosen password. Done.
How to top up your Binance Web3 Wallet
To transfer tokens from another wallet, exchange, or receive a transfer from a third party, complete two steps.
1. In the main wallet window, click the "Receive" button and specify the method of receipt.
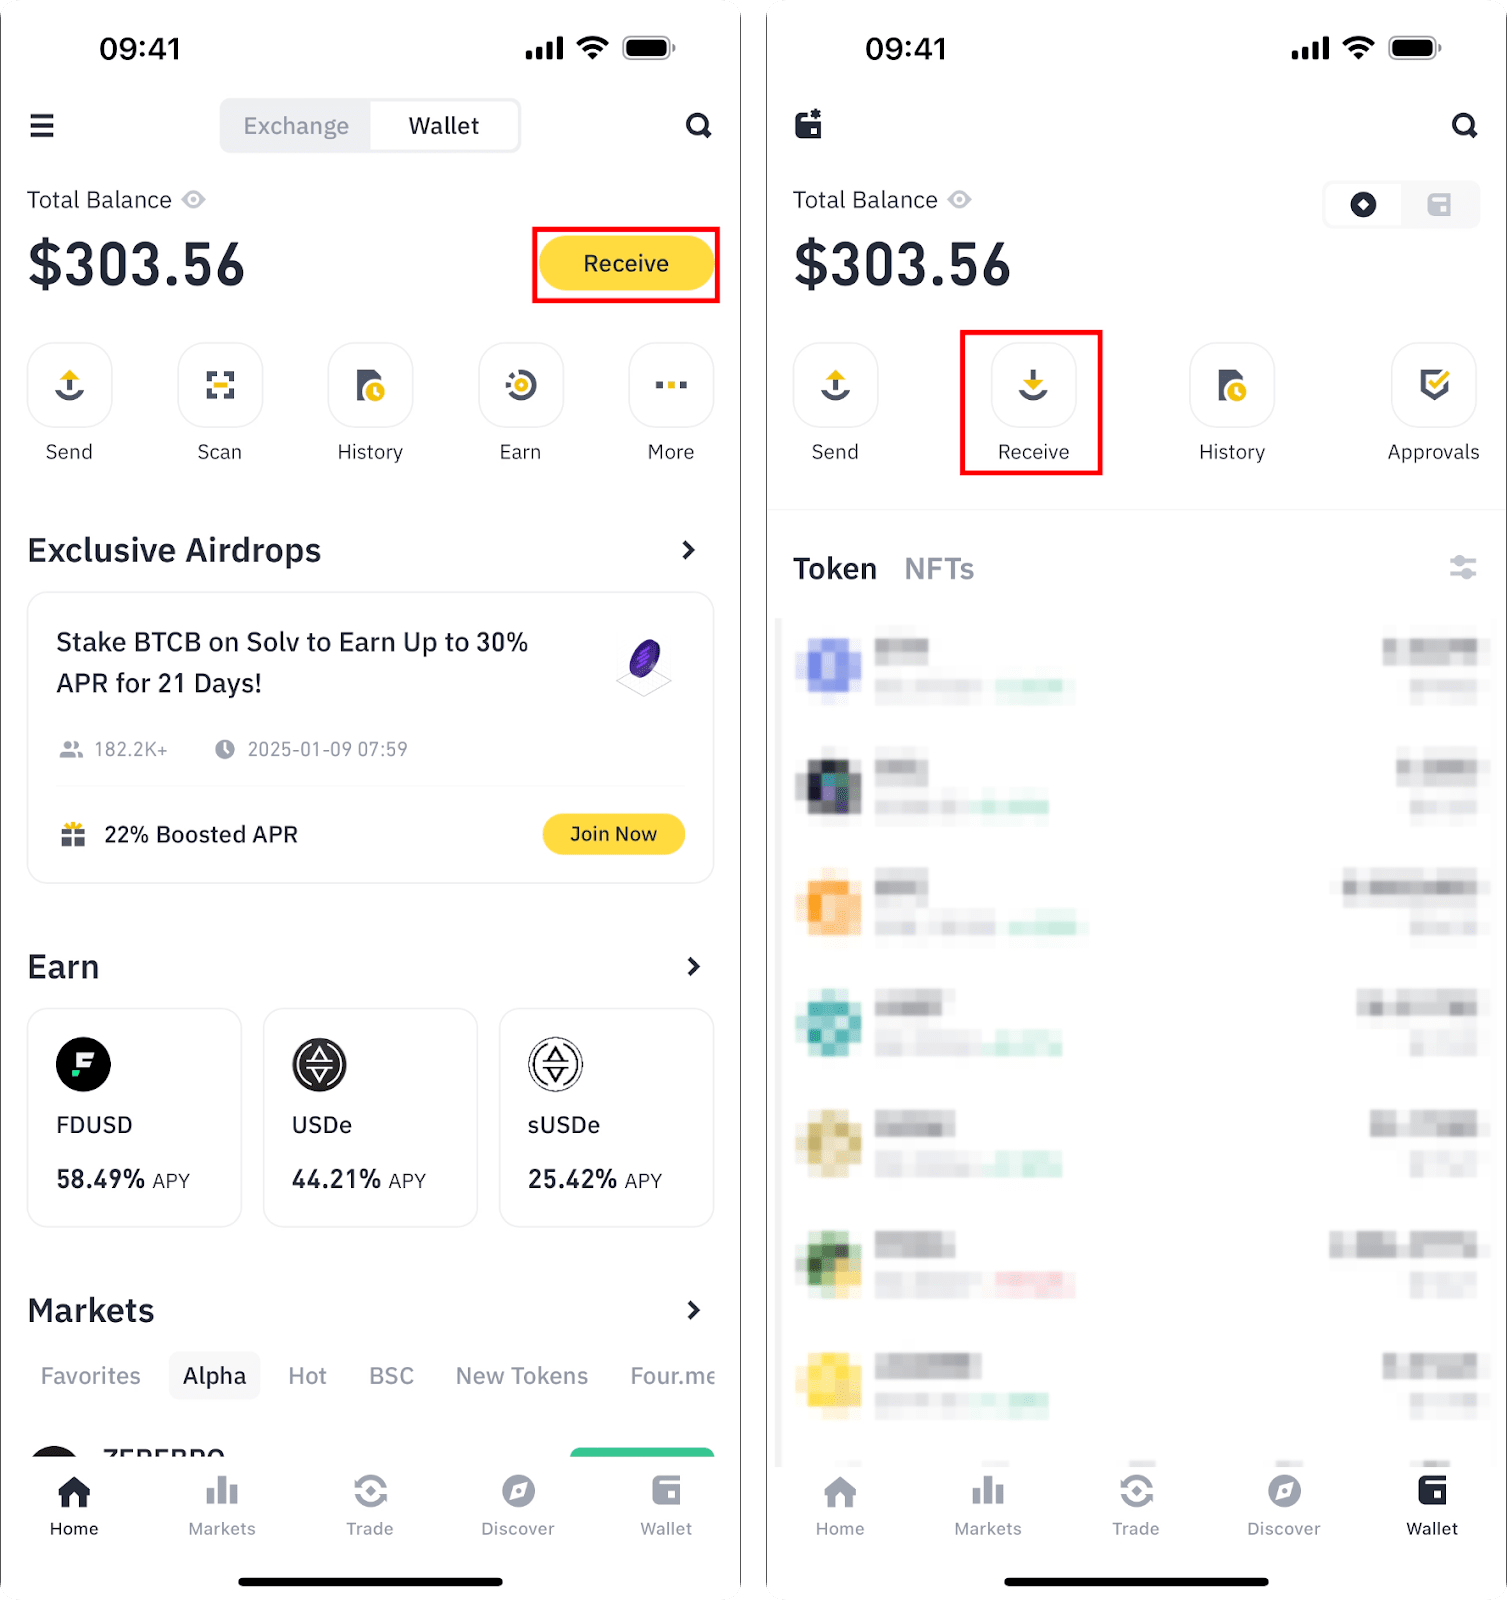
2. If you select the "Receive at address" option, a list of all your addresses will appear — copy the one to which you want to transfer funds. To send the address to a third party, choose the "Share" option. To avoid asset loss, pay attention to the address’s network.
How to send cryptocurrency from Binance Web3 Wallet
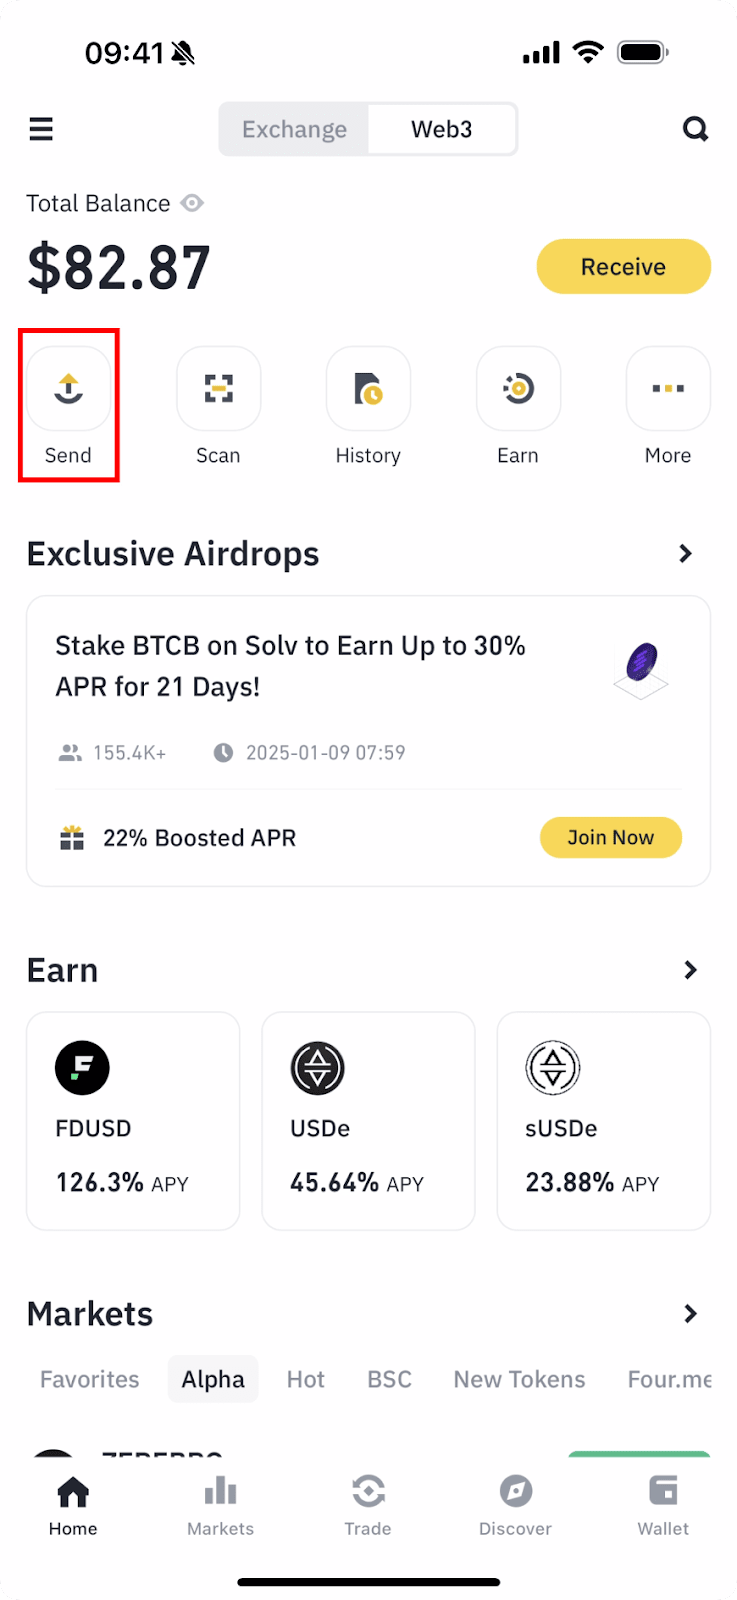
1. In the main wallet window, select the "Send" option. You can also click on any of your assets and press the "Send" button.
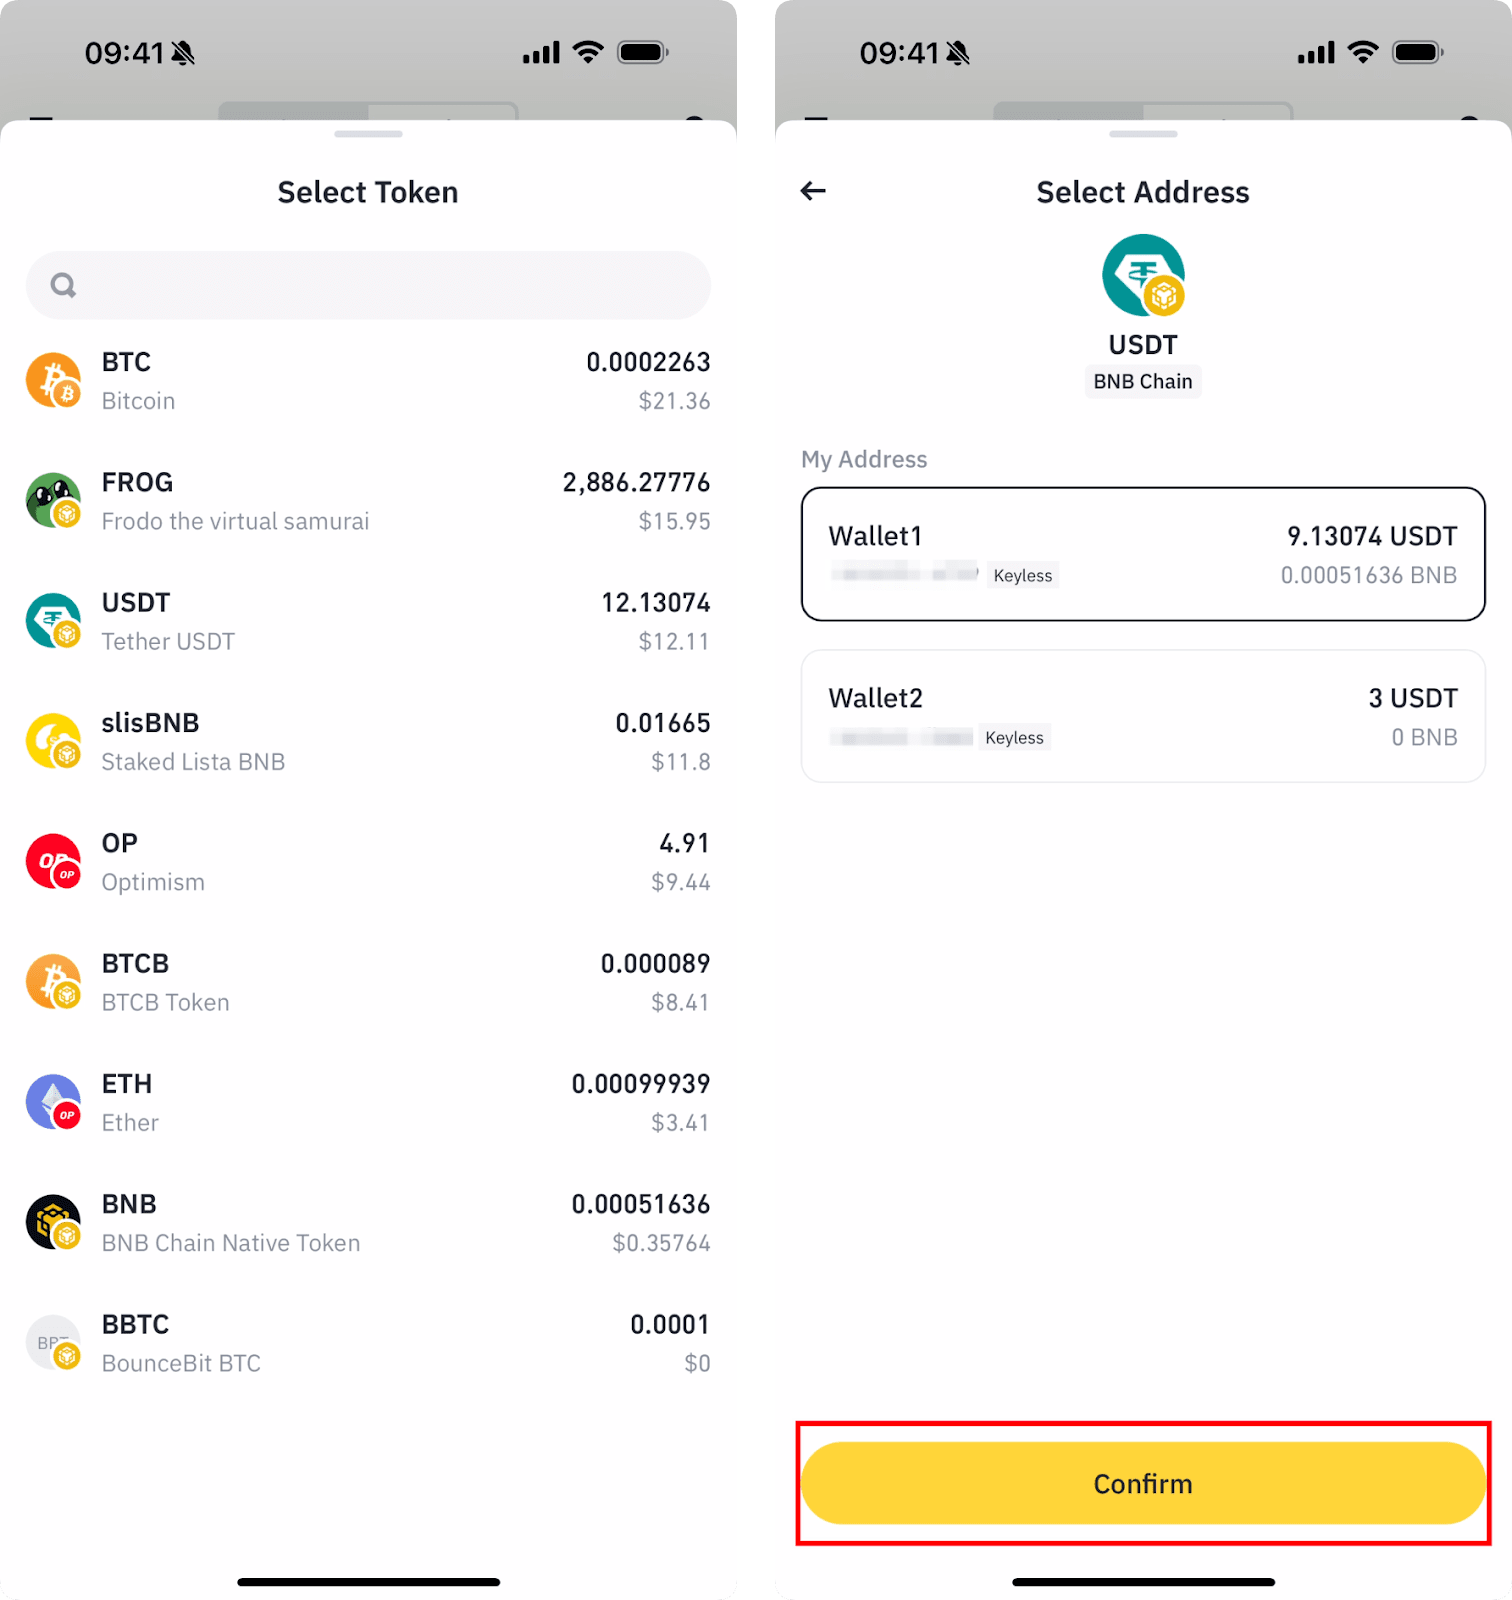
2. If you have more than one sending address, select the one that contains the token you wish to forward, then click the "Confirm" button.
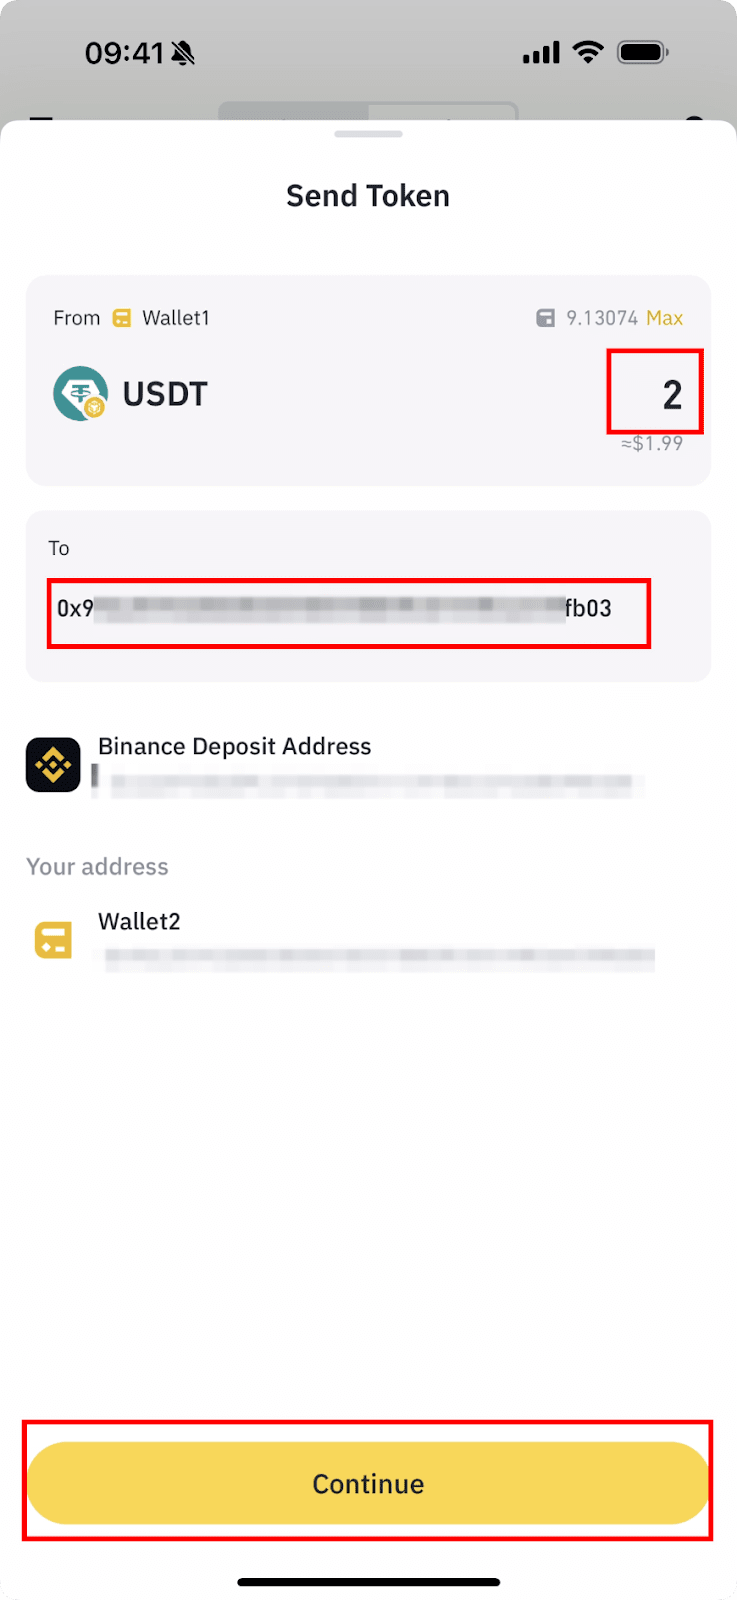
3. Specify the amount you want to send and the recipient's wallet address, then click the "Continue" button.
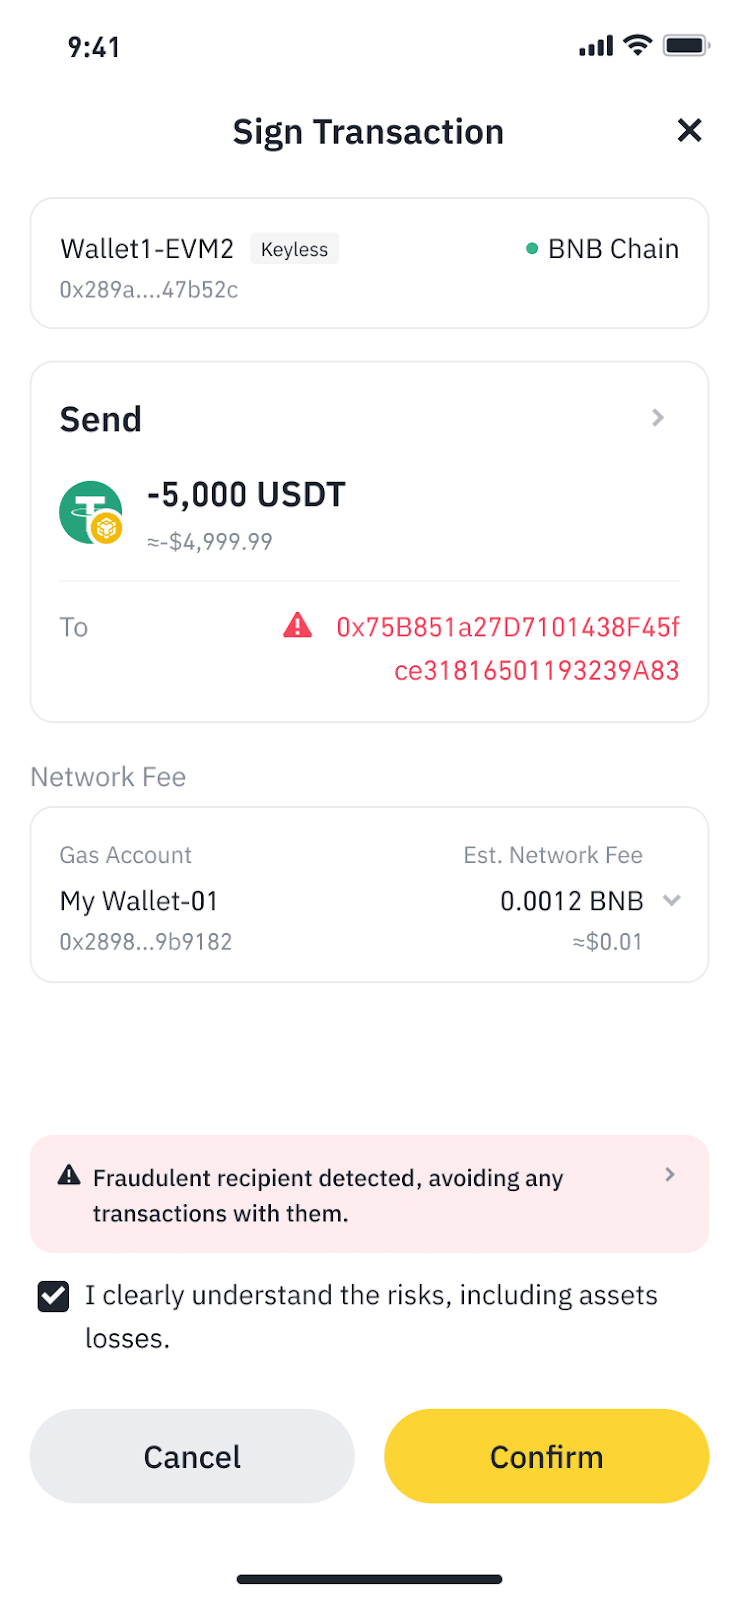
4. If the address to which you want to send cryptocurrency is classified as high-risk, a corresponding notice will appear on the screen. You can press the "Cancel" button to interrupt the sending, or "Confirm" to proceed with the operation. In this case, all transfer risks are on your shoulders.
5. In the next window, a confirmation of the transfer and the fee will open. The wallet balance must have enough funds to pay for the gas. If everything is fine, click the "Confirm" button. After that, you just need to wait for the transaction to complete.