The wallet has both pros and cons — it is necessary to weigh all the advantages and disadvantages to make a decision about using it for managing your XRP.
| Pros | Cons |
| Multisignature support allows you to set up multiple layers of protection for transactions, which significantly enhances security. The wallet also offers biometric authentication (Face ID, fingerprint) to protect assets. | In case of losing private keys, the user may lose their assets, but this is typical for all non-custodial wallets. |
| Besides the XRP network, Xaman is also integrated with other platforms operating on the XRP Ledger, such as Xahau. The wallet supports over 8300 tokens. | The wallet does not support major digital assets like BTC and ETH and many other popular cryptocurrencies, which may limit its users. |
| The app is available for Android and iOS, featuring a simple and intuitive interface. | To fully utilize the wallet's features, the user must have more technical skills and an understanding of the XRP Ledger blockchain. |
| The transaction fee is minimal, making the wallet attractive for regular XRP users. | Xaman does not work on tablets such as Apple iPad because its interface is not adapted for different screen sizes, and many similar devices do not support NFC. |
How to create an account on Xaman
Xaman Wallet is compatible with mobile devices running on Android 7 and iOS 13 (on all models from iPhone 7) and above. Installing the crypto wallet takes no more than 10 minutes. It is recommended to carefully read all the information that will appear in the hints.
Step 1: Download
Download the latest version of Xaman Wallet from Google Play and App Store. Safe download links are available on the official wallet website.

Step 2: Account Creation
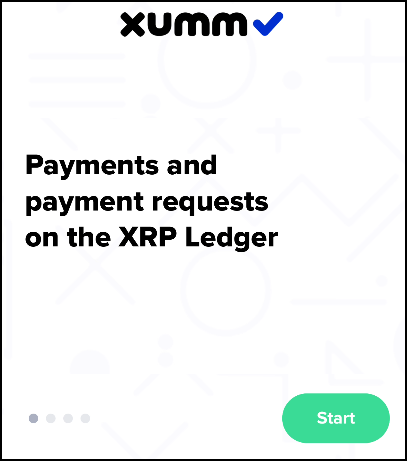
Open the application after installing it on your device. A welcome screen will appear in front of you. Click the 'Start' button to begin using the wallet.
Step 3: Create a password
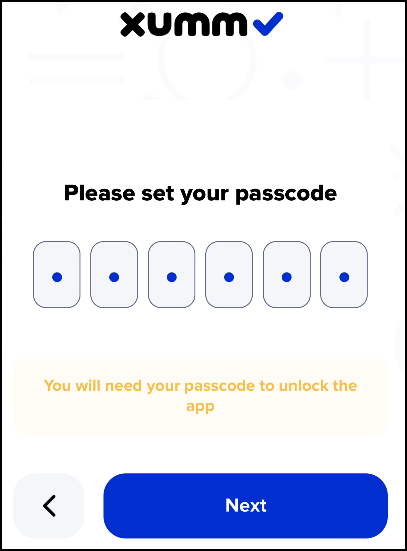
An 'Create Password' window will appear on the screen, which will be requested when logging into the application. Press the 'Start' button and come up with a 6-digit numerical code. For greater security, the password should consist of random non-repeating digits. To confirm, press 'Next', enter the code again, make sure you remember it, and then tap 'Save'.
Step 4: Biometrics
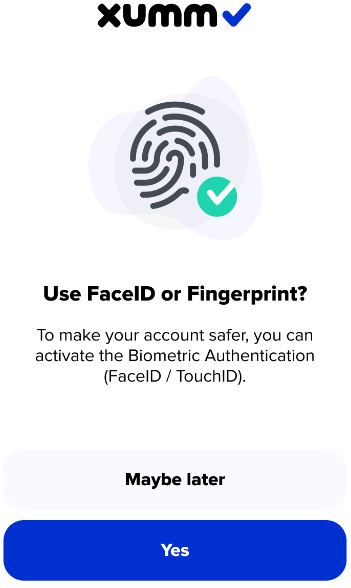
The next setup screen is biometric authentication. If you want to access the app and confirm transactions using your fingerprint, press "Yes." This feature can be disabled at any time in the future.
Step 5: Push notifications
If you want to receive pop-up notifications from the app, click "Yes."

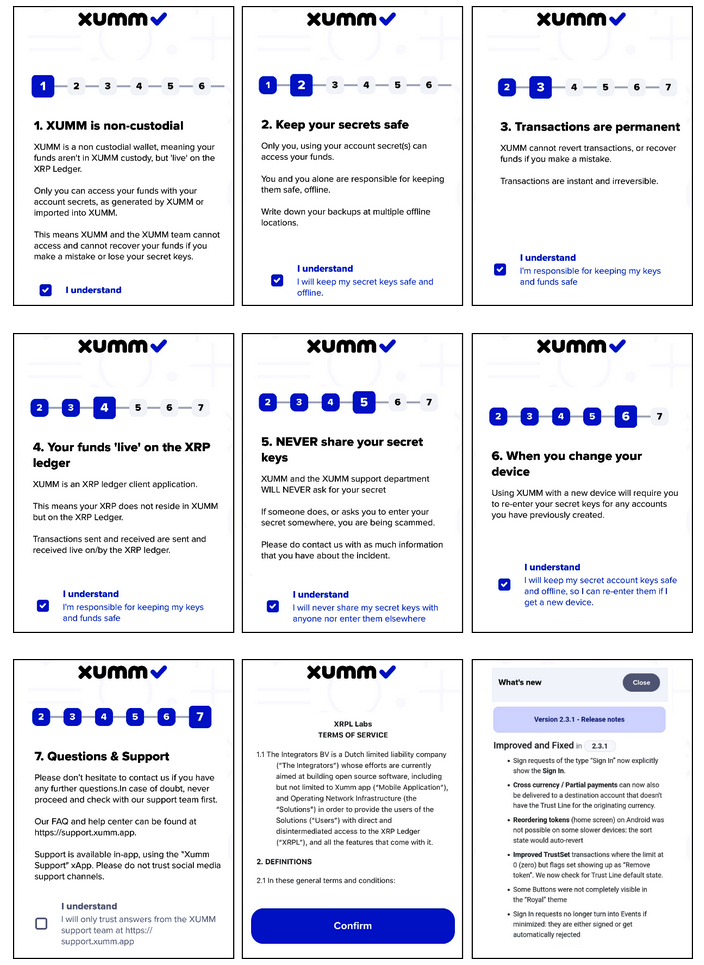
Step 6: Training
The next 9 screens are dedicated to the features of working with the wallet. Please read the information on each page carefully, click 'I understand' to confirm, and at the end — 'Confirm'.
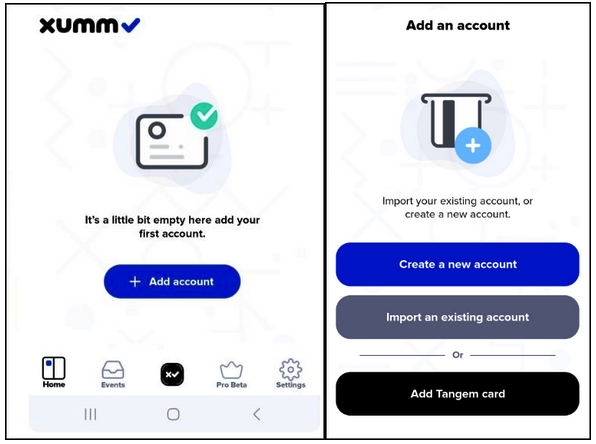
Step 7: User Account
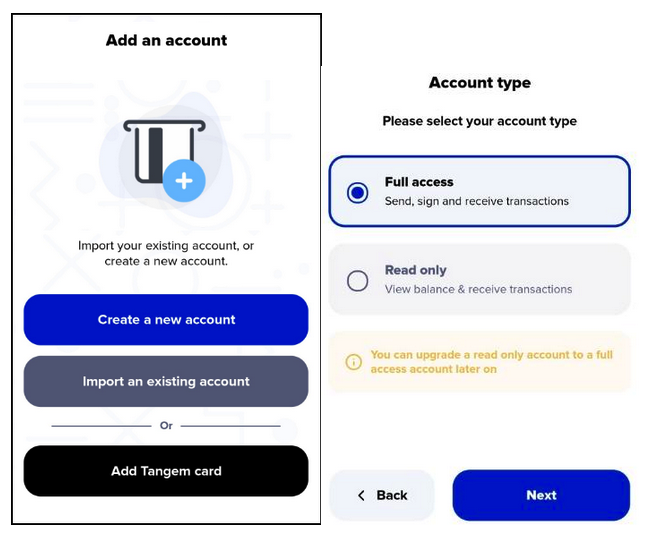
An 'Add Account' window will appear on the screen. You have the option to create a new account or import an existing one.
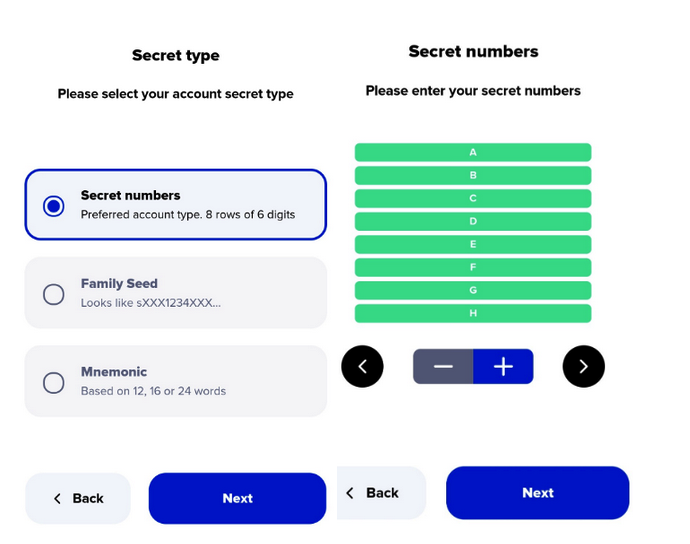
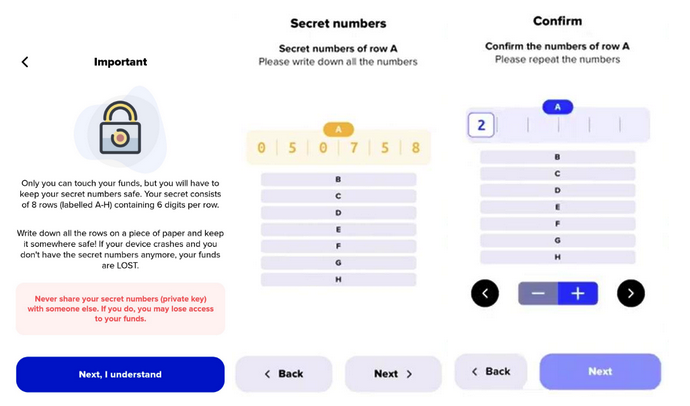
Step 8: Secret Code
To create private keys, you need to set a set of secret numbers, which consist of 8 lines from A to H, each having 6 digits. You need to rewrite all the numbers in the exact order from each line, after which click 'Next'. Then a 'Confirmation' window will appear on the screen: here you need to input all the rewritten numbers back for correctness verification. If the verification is successful, click 'Next' to continue.
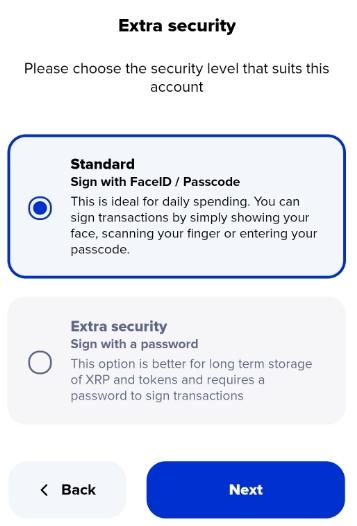
Step 9: Choosing a Protection Method
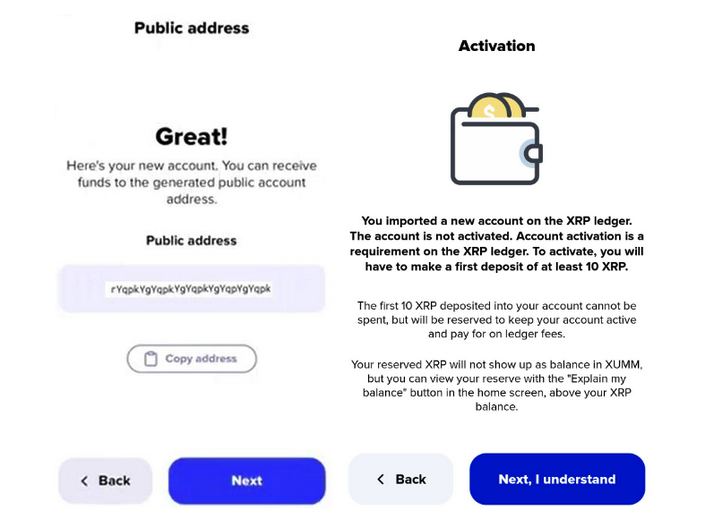
On the next screen, you will see the public address of your wallet, which you will use for transactions in the future. Click "Next" to proceed to the information screen, which discusses the need to activate your account (we will explain this further). Click "Next, I understand".
On the next screen, you will have the option to choose the level of wallet protection:
- Standard - suitable for those who will use Haman for everyday tasks (password and biometric verification);
- Additional security is the optimal choice for long-term cryptocurrency storage (you will need to enter a confirmation password before transactions).
After you make your decision, click the 'Next' button.
Step 10: Account Name
For ease of use, assign a name to the wallet. Done — the account has been created.

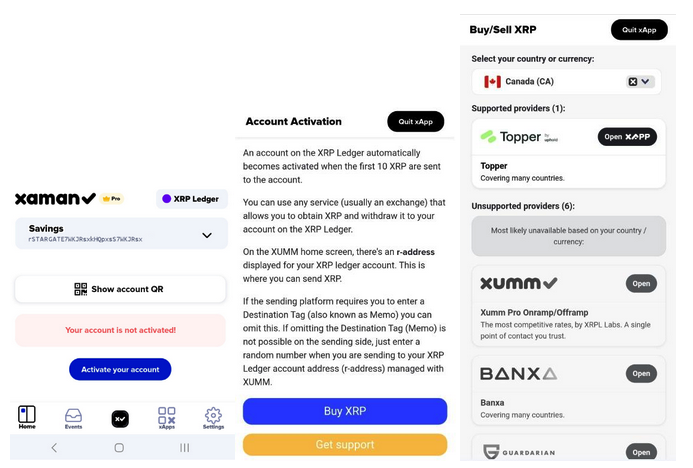
Step 11: Account Activation
To start working with the wallet, you need to activate it. For this, your balance must have at least 10 XRP, which will be frozen. On the main screen of the application, click 'Activate Account' and follow the system's prompts. You will be offered to purchase tokens, for this you need to click 'Buy XRP' and choose a suitable payment method. After the activation is complete, the wallet is fully ready for use.
How to send and receive XRP in Xaman Wallet
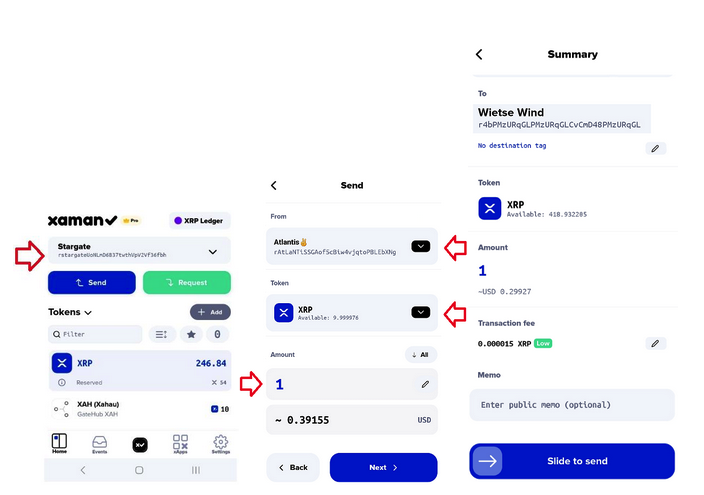
Cryptocurrency operations in the wallet are extremely simple. To receive tokens in your account, you need to copy your public address and go to the "Request" tab. Then, just follow the system prompts — send the address to a third party who will transfer XRP to your account, or transfer the cryptocurrency from your other storage yourself.
To send, go to the 'Send' tab, specify the recipient's address, the token you want to transfer to another user, and the amount of the transfer.
All transactions can be tracked in the "Summary" tab.
How to recover access to your Xaman wallet
If you need to log into your previously created account, in the add window you should select the option 'Import existing account', after which in the next window press 'Full access'.
Upon creating an account, you received a set of secret numbers — 8 rows of 6 digits. With this combination, you will be able to make a backup. Among the proposed recovery options, select 'Secret Numbers', enter them in the opened window, and click 'Next'. If everything is correct, access to the account will be restored.